First 3D Project Thoughts (& Github Link)

Initialization:
I started this project by using a game design bible template made by Thomas Brush. Seeing as this is a class project, I focused solely on the gameplay portions and ignored most of the marketing portions of the document. Initially, I planned this game to be around 70 hours of development. Ultimately, I ended up with around 60 hours of development instead. With regards to the gameplay, I knew that I wanted to make a 3D platformer to learn about State Machines and Level Design. I used Super Mario 64 as the main inspiration of my game.
Mechanics:
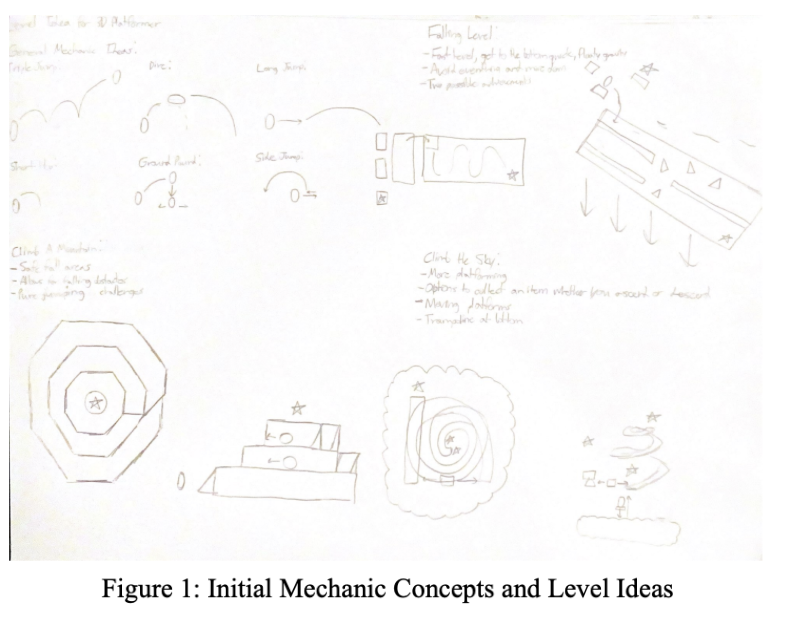
Originally, I planned to make a more complex game with several different types of jumps. Overall, I stuck to using a simple jump and an alternate triple jump. I still kept the dynamic camera similar to planned. Outside of the player, I implemented several separate concepts to experiment with UI and level design. I implemented collectables that adjust the UI, spikes that damage the player, and checkpoints. [1]
Level Design:
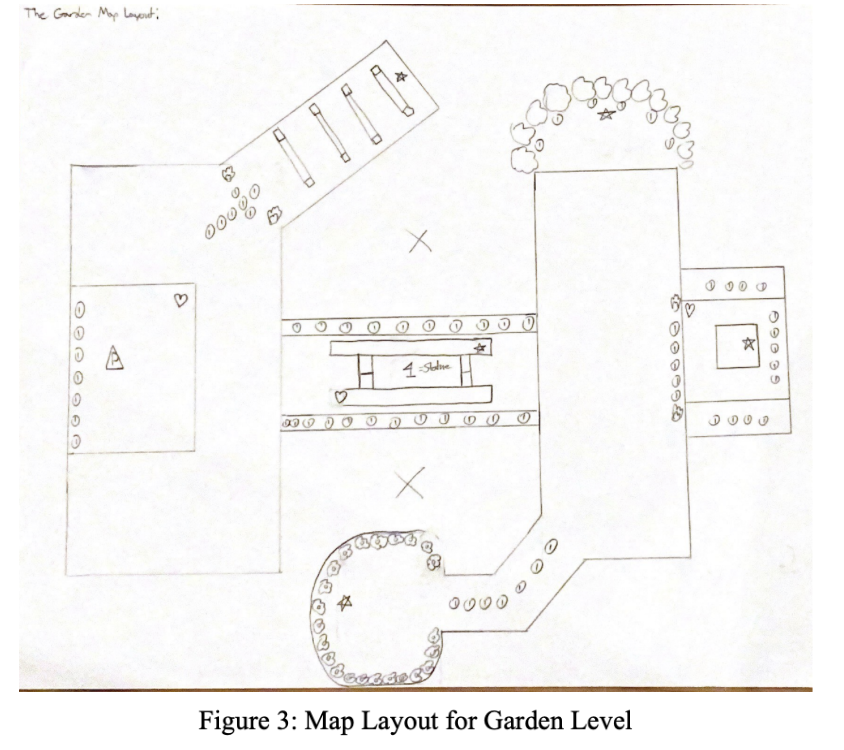
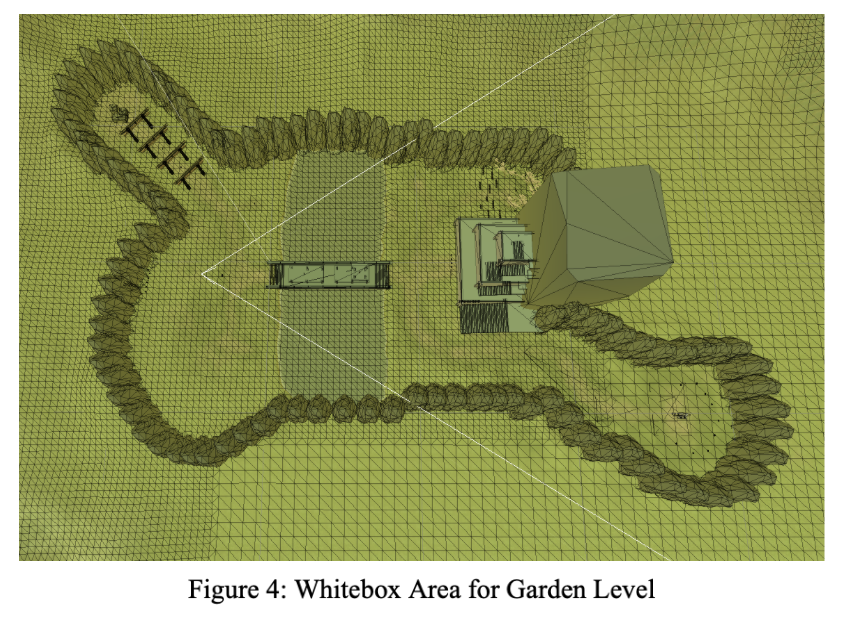
Level design was the trickiest concept to understand. Typically, I would plan out levels by sketching them and experimenting with tilesets. This method worked for 2D but not for 3D. The only sketches I could make were perspective based but this did not do a good job of determining where items should be placed and how areas should be laid out in relation to each other. I learned from a GDC video about a level design process to make my level. This process involves making an abstract bubble layout [2], making a map plan [3], and whiteboxing [4]. The abstract bubble layout is simply making a bunch of abstract areas that should be in a general level. I combined this idea with the idea of a playground and nodes that I learned in class. As such, I included areas such as “Safe Zones”, “Nodes”, “Landmarks”, etc. The map layout is used to connect the areas close to each other together and make the borders more specific. Whiteboxing is done to create a 3D representation of the level in Unity. I used the Blockout Asset from the Unity Asset Store to do this efficiently. With everything more solidified in place, I was able to make more obstacles to collect star pieces and coins for the final design.
Art/UI/Sounds:
I learned to use the Unity Terrain tool from a free course called Easy3D by Thomas Brush. This allowed me to make a better ground area for my level. Additionally, this helped me lay out and signal to the player the paths for the stage that they can take. Originally, I planned to make the player models in Blender but opted to use used assets from the Unity Store instead to save time. For UI, I used https://thenounproject.com/ to find usable icons. I added text to them by using Google Drawing. For Sounds, I used https://freesound.org/ and Audacity to add sounds to my project.
Music:
The game features a single soundtrack provided to me by Alex Castro, a family member who I approached to make a track for free.
Trailer:
I attempted to make a short trailer to showcase my game for the experience. I decided to make it a 30-second clip with a few transitions. I used a video from Game Maker’s Toolkit as a reference for how to make an effective trailer. Lastly, I have experience using Adobe Premiere so that was the software I used to make and edit the trailer. Unfortunately, a good bit of the footage got corrupted from using QuickTime to screen capture clips.
GitHub:
https://github.com/Cannondian/3DFinal.git
Conclusion:
I completed my objectives and managed to learn how to implement State Machines and 3D Level Design in Unity. After presenting my project to the class, I became confident in the game that I made and feel that I can submit this project without much issue. My only regret is that I was not able to make more 3D levels besides the Tutorial and Garden Levels due to time constraints. Regardless, I learned an important design process that I can use for my next project.
Files
Collapse
Quick 3D Platformer made for GameDev Course
| Status | Released |
| Author | Cannondian |
Leave a comment
Log in with itch.io to leave a comment.